| wangeditor上传图片回显 | 您所在的位置:网站首页 › layui 图片回显 › wangeditor上传图片回显 |
wangeditor上传图片回显
|
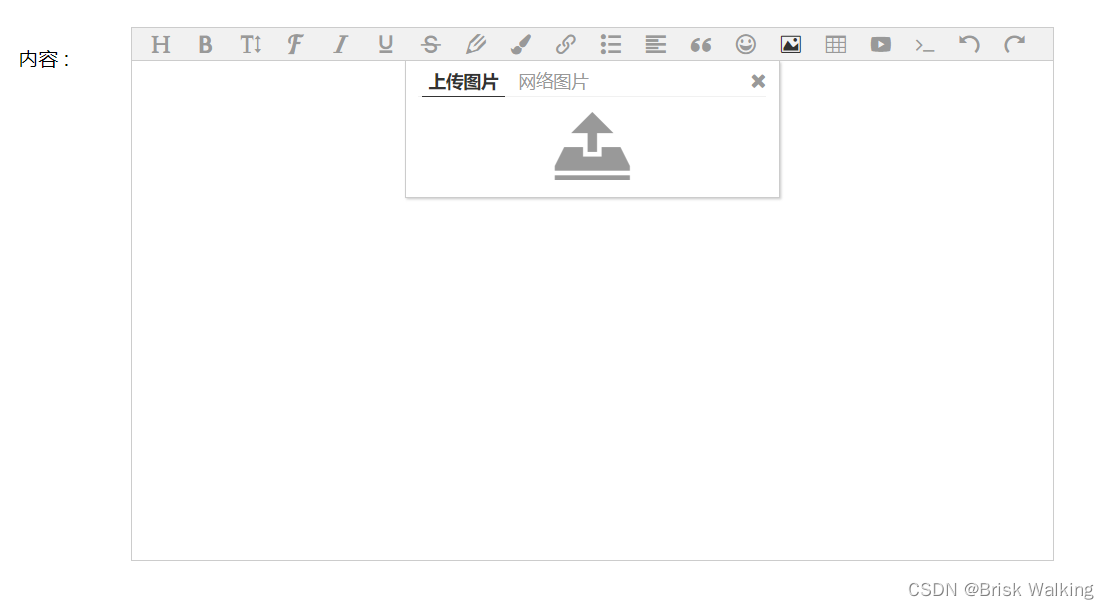
1:需要创建一个div来存放 2:我们需要引入wangeditor他自己的js 3:然后就是js的代码 let E = window.wangEditor; let editor = new E('#toolbar-container') let $text1 = $('#editor-container'); editor.customConfig.onchange = function (html) { // 监控变化,同步更新富文本内容到 textarea // console.log(editor.txt.html()) $text1.val(html); } editor.customConfig.uploadImgMaxSize = 1 * 1024 * 1024 editor.customConfig.uploadImgServer = 'userContribute'; //自定义上传图片(改成自己写的图片上传方法的路径) editor.customConfig.uploadFileName = 'file'; //自定义文件名 editor.customConfig.maxNumberOfFiles = 2; editor.customConfig.uploadImgHooks = { success: function (xhr, editor, result) { // console.log(result); // 图片上传并返回结果,图片插入成功之后触发 // xhr 是 XMLHttpRequst 对象,editor 是编辑器对象,result 是服务器端返回的结果 }, customInsert: function (insertImg, result) { // 图片上传并返回结果,自定义插入图片的事件(而不是编辑器自动插入图片!!!) // insertImg 是插入图片的函数,editor 是编辑器对象,result 是服务器端返回的结果 // 举例:假如上传图片成功后,服务器端返回的是 {url:'....'} 这种格式,即可这样插入图片: let url = result['url']; insertImg(url) // result 必须是一个 JSON 格式字符串!!!否则报错 } } editor.customConfig.customAlert = function (info) { //关闭默认提示信息 // info 是需要提示的内容 //alert('自定义提示:' + info) } // 或者 var editor = new E( document.getElementById('content') ) editor.create(); $text1.val(editor.txt.html());4:然后是后台的代码 /** * 用户投稿文件显示存放 * @param * @param request * @return */ @PostMapping("/**/userContribute") @ResponseBody private ImgInfo userContribute(@RequestBody MultipartFile file, HttpServletRequest request) { ImgInfo imgInfo = new ImgInfo(); System.out.println("进来了吗"); Random random = new Random(); int intRandom = random.nextInt(50000000)+1; System.out.println("------>>>"+file); String path = request.getSession().getServletContext().getRealPath("/image/contribute"); boolean multipartContent = ServletFileUpload.isMultipartContent(request); System.out.println(multipartContent+"------->"); //将上传的文件保存 try { //1:获得当前上传文件的输入流 InputStream inputStream = file.getInputStream(); //2:获得当前上传文件的输出流\ //2.1:把路径分出来定义 String pathFile = path + "\\" +intRandom+file.getOriginalFilename(); FileOutputStream fileOutputStream = new FileOutputStream(pathFile);//文件名字 System.out.println(pathFile+"地址"); // String value = "http://localhost/dynamic/image/contribute/" +file.getOriginalFilename(); String value = "../image/contribute/" +intRandom+file.getOriginalFilename(); String[] values = { value }; imgInfo.setError(0); imgInfo.setUrl(values); System.out.println(imgInfo); //3:执行文件拷贝到存放的位置 IOUtils.copy(inputStream, fileOutputStream); //4:关闭流资源 inputStream.close(); fileOutputStream.close(); } catch (IOException e) { e.printStackTrace(); } return imgInfo; }5:因为imgInfo是我自己定义的一个类 public class ImgInfo implements Serializable { private Integer error; private String[] url; public Integer getError() { return error; } public void setError(Integer error) { this.error = error; } public String[] getUrl() { return url; } public void setUrl(String[] url) { this.url = url; } @Override public String toString() { return "ImgInfo [error=" + error + ", url=" + Arrays.toString(url) + "]"; } }6:然后我们看看效果和样式吧!
|

【本文地址】
公司简介
联系我们
| 今日新闻 |
| 推荐新闻 |
| 专题文章 |